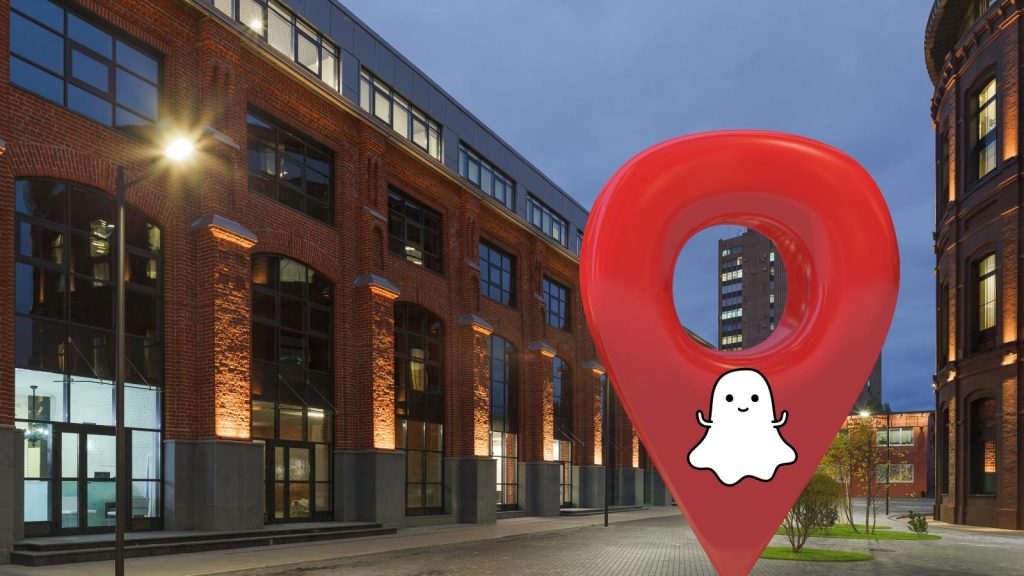
Snapchat geofilters for location feature allows your business to create a custom geofilter and increase your brand’s visibility. With their large user base, leveraging this Snapchat geofilter can significantly enhance your business’s reach and engagement.
In this blog post, you will learn why this feature can help you with a step-by-step process of creating a location on Snapchat for your business account. Thus enabling you to effectively connect with your target audience and promote your brand.
Table of Contents
Understanding Snapchat Geofilters
What Are Geofilters?
Geofilters on Snapchat are location-based overlays that you can apply to your photos and videos. These filters are unique to specific locations and are a fun way for you to share where you are.
Geofilters can be designed by individuals, businesses, or artists, and they are a great way to enhance the content shared on the platform.
Benefits of Using A Snapchat Geofilter for Business
Using Geofilters for business can have several benefits. Firstly, it allows your business to increase brand visibility among Snapchat users in specific locations. By creating a custom Snapchat Geofilter for your business, you can effectively promote your brand to a targeted audience.
Moreover, Snapchat Geofilters can also drive engagement and increase brand awareness. When you see a unique filter available at a particular location, you are more likely to use it in your snaps, thereby organically promoting the business to your followers.
Additionally, creating and using Geofilters can help businesses stay ahead of their competitors by showcasing their creativity and innovation. It provides an opportunity for businesses to connect with their audience in a fun and interactive way, leaving a lasting impression.
Creating a Geofence for Your Business
Choosing the Location
When creating a geofence for your business on Snapchat, it’s essential to choose a location that aligns with your target audience. Consider areas with high foot traffic, such as popular landmarks, event venues, or busy shopping districts.
Understanding your customer demographics and preferences will help in selecting the most effective location for your geofilter.
Setting the Geofence Parameters
Snapchat provides a user-friendly interface for setting geofence parameters. You can easily outline the specific area where you want your geofilter to be available.
Take advantage of the map tool to precisely define the boundaries of your geofence, ensuring that it covers the desired location without extending too far beyond it.
This targeted approach will help maximize the impact of your geofilter within the chosen area.
Duration and Schedule for Your Geofilter
It’s crucial to establish the duration and schedule for your geofilter to coincide with events, promotions, or peak business hours. Determine the timeframe during which you want the geofilter to be accessible to Snapchat users within the designated location.
Whether it’s a one-time event or an ongoing campaign, aligning the geofilter schedule with your business activities can boost its relevance and effectiveness. You can see from the above image of the UFC on the map.
By strategically selecting the location, defining precise geofence parameters, and setting an appropriate duration and schedule, you can optimize the impact of your business geofilter on Snapchat.
Designing Your Snapchat Geofilter
Adhering to Snapchat’s Guidelines
When designing a geofilter for your business on Snapchat, it’s crucial to adhere to Snapchat’s guidelines to ensure your filter gets approved.
These guidelines include avoiding logos or trademarks you don’t own, maintaining a transparent background, and not covering up too much of the screen.
By following these guidelines, you’ll increase the likelihood of your geofilter being accepted and seen by users.
Using Professional Tools or Templates
To create a professional-looking geofilter, consider using design tools like Canva or Adobe Photoshop. These tools offer advanced features and flexibility to bring your brand elements to life.
Alternatively, you can use Snapchat’s own templates to ensure your geofilter meets their technical specifications and looks polished. You can have a lot of fun designing them.
Incorporating Brand Elements
When designing your geofilter, be sure to incorporate your brand elements such as your logo, colors, or slogans. This helps enhance brand recognition and makes your filter more relevant to your business.
By seamlessly integrating your brand into the filter, you can effectively promote your business to Snapchat users within the geofenced area.
Submitting Your Geofilter for Review
Uploading Your Design for Snapchat Geofilter
To get started with creating a location on Snapchat for your business, the first step is to design your geofilter. This can be done using graphic design tools or by hiring a professional designer to ensure that your geofilter is visually appealing and aligns with your brand’s image.
Once you have your design ready, you can move on to the next step of submitting it for review.
Selecting the Geofence Area
After finalizing your geofilter design, the next crucial step is to select the geofence area where you want your geofilter to be available. This area should be strategically chosen to target locations where your target audience is likely to be present.
It could be around your business location, an event venue, or any other specific area relevant to your business.
Reviewing the Submission Guidelines
Before submitting your geofilter for review, it’s important to review Snapchat’s submission guidelines to ensure that your design meets all the necessary requirements. This includes adhering to the file format, size, and other specifications outlined by Snapchat.
By carefully reviewing the submission guidelines, you can increase the chances of your geofilter being approved and made available for use in the selected geofence area.
Setting Up Payment and Scheduling With Snapchat Geofilters
Understanding Pricing
When setting up a location on Snapchat for your business account, it’s essential to understand the pricing structure. The cost of creating a location varies based on factors such as the duration of the geofilter and the size of the geographical area it covers.
Snapchat provides a clear breakdown of the pricing to help you make an informed decision that aligns with your budget and marketing objectives.
Selecting the Duration and Time for Snapchat Geofilter
After comprehending the pricing details, the next step is to select the duration and time for your geofilter. Consider the timing of your event or promotion and choose a duration that ensures your geofilter is active when your target audience is most likely to engage with it.
Snapchat offers flexibility, allowing you to schedule the activation of your geofilter to maximize its impact.
Completing the Payment
Once you’ve determined the pricing and scheduling details, completing the payment is a straightforward process on Snapchat’s platform.
The interface is user-friendly, guiding you through the payment process with ease. You can use credit cards or Paypal on this social network.
You can securely enter your payment information and finalize the transaction, ensuring that your geofilter goes live as planned.
By carefully navigating the process of setting up payment and scheduling, you can effectively leverage Snapchat’s geofilter feature to enhance your business’s visibility and engagement with your audience.
Monitoring and Analyzing Performance of a Snapchat Geofilter
Accessing Insights on Snapchat
To effectively monitor and analyze the performance of your location on Snapchat, it is crucial to access the insights provided by the platform. These insights offer valuable data on how your location is performing, including metrics such as views, shares, and interactions.
By regularly reviewing these insights, you can gain a deeper understanding of your audience and tailor your content to better resonate with them.
Evaluating Engagement and Reach
Engagement and reach are key metrics to evaluate when assessing the performance of your business location on Snapchat. Engagement metrics, such as likes, comments, and shares, provide insight into how your audience is interacting with your location.
Reach metrics, including the number of views and unique viewers, indicate the extent of your location’s visibility. By evaluating these metrics, you can gauge the effectiveness of your content and make informed decisions on future strategies.
Repetition Based on Performance Data
Using the performance data obtained from Snapchat insights, you can repeat your approach to optimize the performance of your business location. Identify trends and patterns in the data to determine what content your audience prefers.
Adjust your content strategy based on this data, continuously refining and optimizing to improve engagement and reach.
By repeating your marketing based on performance data, you can adapt to the evolving preferences of your audience and enhance the impact of your location on Snapchat.
Conclusion of Using A Snapchat Geofilter
In conclusion, creating a location on Snapchat for your business account can significantly enhance your brand’s visibility and engagement with your target audience.
By following the simple steps outlined in this Snapchat Geofilter guide, you can establish a strong presence for your business on Snapchat. It will allow you to connect with local customers and drive foot traffic to your physical location.
Embrace the power of location-based marketing on Snapchat to lift your business to new heights. Have you tried to create snapchat geofilters for your business? I’d love to hear about your experience in the comments.